Workflow
This is a workflow for using GeoNetwork to meet the Government’s guidance on sharing tabular data.
Choosing a data format
We recommend using CSV for your non-spatial tabular datasets to meet Government data sharing guidance but json may be a more suitable format if the data is more complex. See Government API guidelines for information on good practice for json.
If you are more accustomed to sharing data as an Excel spreadsheet, we would definitely recommend that you convert to CSV as above for data sharing to avoid security risks from macros, or problems arising from Excel’s auto-formatting functionality.
Formatting your data as a CSV
The Government’s guidance on a tabular data standard recommends that you share non-spatial metadata in CSV format, meeting the following specifications:
0 or 1 header rows (preferrably 1)
After the header row, each row should represent a record (eg no blank lines, totals or so on)
Fields are separated by commas, with text optionally delimited with double quotes
All rows have the same number of fields
Line-breaks use windows style “\r\n”
Use UTF8 for encoding
No Byte Order Mark (see the link above for more information)
Creating a metadata record
Log into GeoNetwork as a user with at least Editor priviliges or higher, and go to the Contribute Tab. Choose Add a new record and then select nonGeographicDataset from the list on the left. Assuming you have followed the configuration instructions you should be offered the template Template for metadata in ISO19139 non-spatial format. Select that by clicking it, then choose the group you wish to create the record in, and finally click the green +Create button.
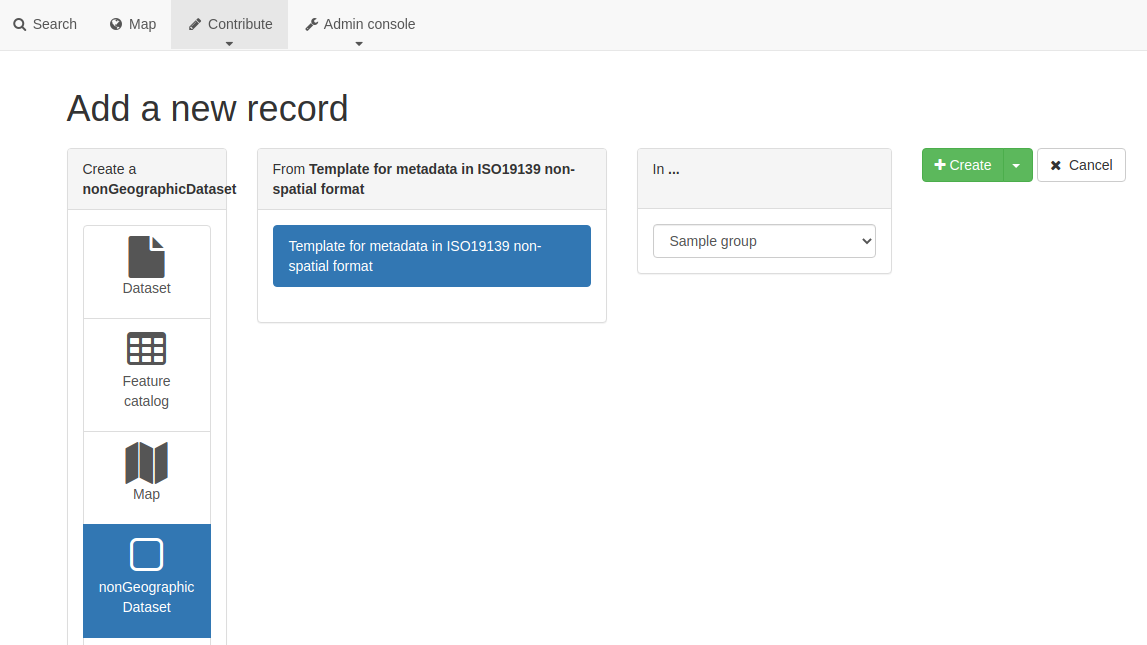
Fill in all the fields shown in the default non-spatial view
Uploading your dataset
In your non-spatial record, use the Associated resourcses wizard in the top right and click +Add. From the list of options, choose Link an online resource.
In the metadata file store section to the right, click the green +Choose or drop resource here button to navigate to your CSV file. Once it is uploaded select it from the list so that some of the options in the boxes on the left are auto-completed for you.
Fill in a description, and choose Download from the list of functions. You can leave the Application profile section blank. Finally click the green Add online resource button.
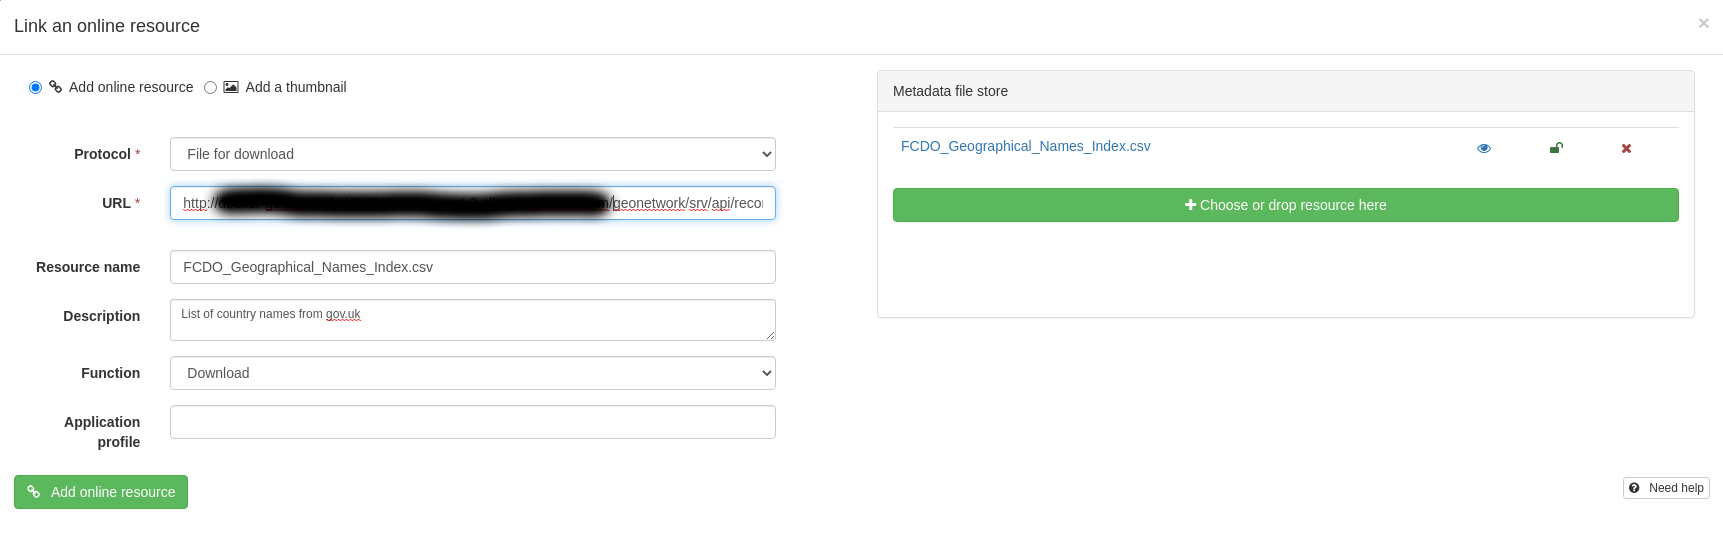
Important
GeoNetwork will check that the URL to the CSV file is reachable, and will show you an error message at the bottom if it is not. In that case, check the URL is correct.