Harvesting
This section outlines the options available for harvesting spatial and non-spatial metadata from various endpoints.
To set up a new harvester in GeoNetwork 4.2.x login as an Administrator and go to Admin console > Harvesting > Catalog harvesters
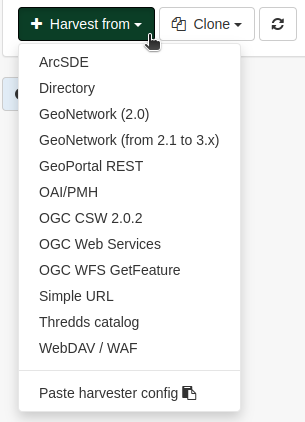
To add a new harvester click on the Harvest from dropdown. The available sources are:
ArcSDE
Directory- this will harvest from a directory located on the same server as GeoNetwork
GeoNetwork (2.0)
GeoNetwork (from 2.1 to 3.x)
GeoPortal REST
OAI/PMH
OGC CSW 2.0.2
OGC Web Services
OGC WFS GetFeature
Simple URL
Thredds catalog
WebDAV/WAF
Directory harvesting
This option allows users to harvest records from the same server that runs GeoNetwork.
Important
If you are running GeoNetwork in a dockerised setup you will need to map the local directory to a volume and the path will become the mapped volume path.
For example if the docker mapping is ./harvester-test:/var/lib/jetty/webapps/geonetwork/harvester-test,
then the path that the harvester needs to be pointed at has to be /var/lib/jetty/webapps/geonetwork/harvester-test

An example setup for harvesting in a dockerised setup
The main configuration options for a directory harvest are:
Node name and logo- this is the name of the harvester and a logo
Note: in order to be able to associate a logo to the harvester, it needs to be pre-loaded into the catalog. This can be done in Admin console > Settings > Logo
Group- the group which owns the harvested records
User- a user can be picked from the list and will be the owner of the records
Schedule- this feature can be enabled or disabled. If enabled, the user can set a recurring harvest
Directory- this is the path to the Directory that holds the records
Also search in subfolders- if ticked this will point the harvester to any existing subfolders too
Action on UUID collision- this dictates what action will be taken if a UUID already exists in the catalog. This can be set to:
Skip record (default)
Overwrite record
Create new UUID
Update catalog record only if file was updated (tickbox)
Keep catalog record even if deleted at source (tickbox)
Validate records before import- the default option is to accept all metadata without validation
XSL transformation to apply
Batch edits
Category- the category to be allocated to the harvested records
Group privileges for the harvested records
Warning
This method has been tested in GeoNetwork 4.2.x and it successfuly harvested .ZIP and .XML records, however only .XML records are shown and accounted for in the Metadata records tab on the harvester page.

Simple URL harvesting
This option allows users to harvest records from various enpoints like DCAT/rdf or JSON (ESRI).
Important
You’ll need to adapt the config to match the exact feed that you’re trying to harvest- so manually look at it to identify the overarching dataset and identifier elements before continuing.
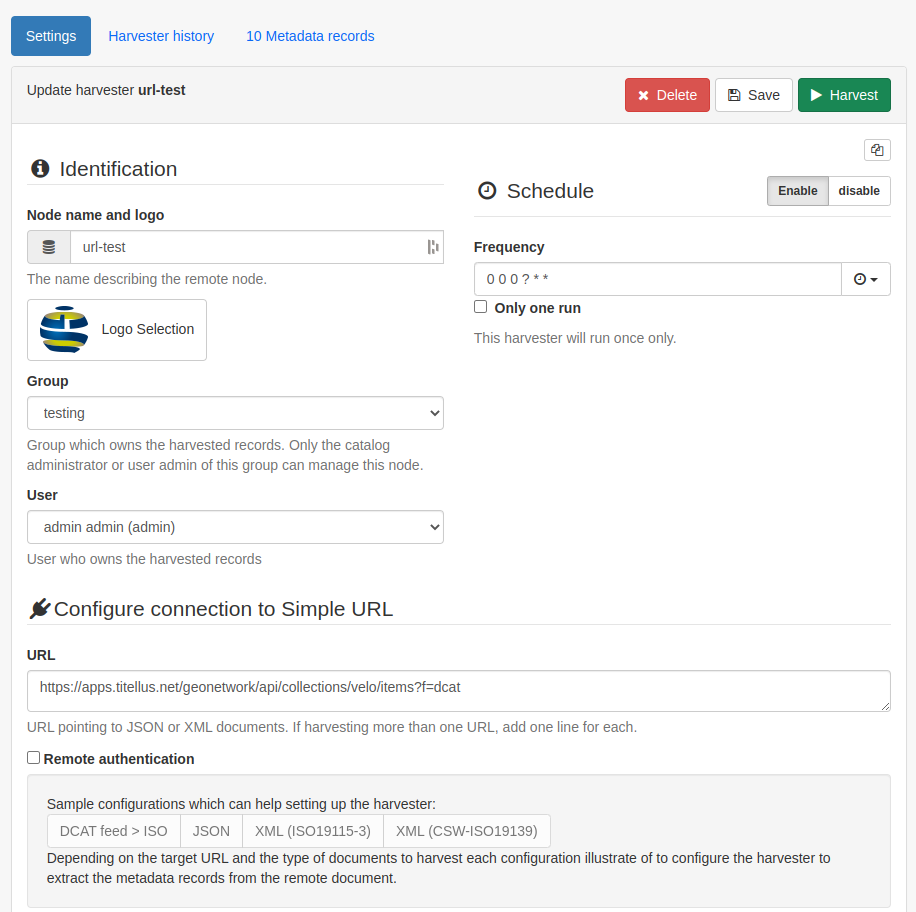
The main configuration options to set are:
Node name and logo- this is the name of the harvester and a logo
Note: in order to be able to associate a logo to the harvester, it needs to be pre-loaded into the catalog. This can be done in Admin console > Settings > Logo
Group- the group which owns the harvested records
User- a user can be picked from the list and will be the owner of the records
Schedule- this feature can be enabled or disabled. If enabled, the user can set a recurring harvest
URL- path to endpoint for whole catalog (e.g.
https://apps.titellus.net/geonetwork/api/collections/velo/items?f=dcat)Element to loop on- the XPath for the element that represents a dataset (e.g.
dcat:CatalogRecord)Element for the UUID of each record- the element inside the dataset loop that should be used as the unique identifier (e.g.
./dct:identifier)XSL transformation to apply- these are now done on a per schema basis, so find the correct file and add it as follows:
schema:{schemaname}:convert:{optional folder inside the schema's convert folder}/{filename without the xsl suffix}(e.g.schema:iso19115-3.2018:convert/DCAT/sparql-to-iso19115-3)Batch edits
Category- the category to be allocated to the harvested records
Group privileges for the harvested records
The top section of the configuration for an example Simple URL harvester

The middle section of the configuration for an example Simple URL harvester

The bottom section of the configuration for an example Simple URL harvester